The Design Editor
The design editor is where you build your graphics. Everything you need is in one place — no switching between tabs or panels.
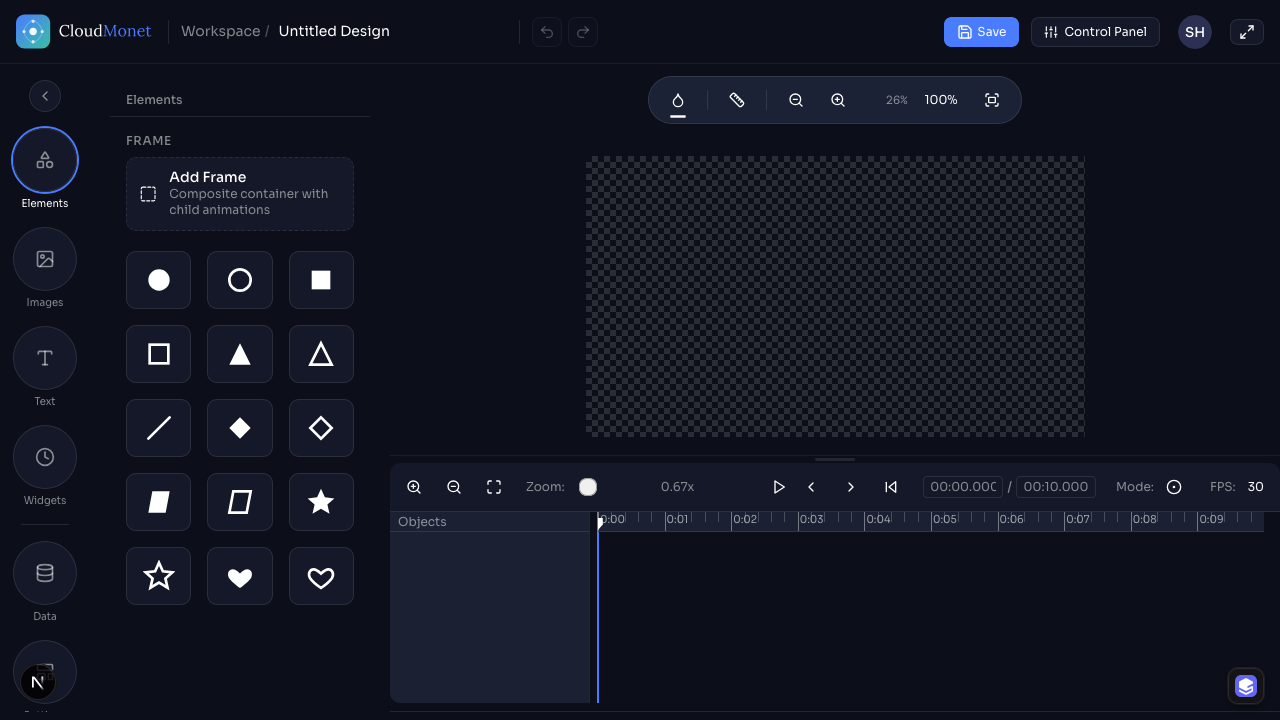
The main areas
Sidebar (left)
The sidebar has two parts working together: a narrow icon rail and a panel next to it.
The icon rail switches what the panel shows:
| Item | What it does |
|---|---|
| Elements | Shapes and stickers, plus Add Frame — see Frames |
| Images | Upload an image or pick from your library |
| Text | Add a text box or heading |
| Widgets | Add a live/dynamic object — Clock, Counter, Timer, Ticker, or Scroller |
| Data | Connect a live data source to bind into objects on the canvas |
| Settings | Playback mode (Timeline vs. State mode), the API token for triggering transitions externally, state management when State mode is on, and the default section order for the control app |
The panel is also where object properties live. When nothing is selected on the canvas, it shows whichever icon-rail item is active. The moment you select an object, it switches to three tabs instead: Design (styling and position — see Object Properties), Animate (see Animation & Timeline), and Bind (operator controls and live data — see Bind). There's no separate panel elsewhere for this; selecting an object temporarily takes over the same space.
Collapse the sidebar with the arrow button at the top to reclaim canvas space.
Canvas (center)
What you build here is exactly what gets published or exported. Objects placed on the canvas can be selected, moved, resized, rotated, and animated. The canvas size reflects the resolution you chose when creating the project — for example, 1920×1080 for Full HD.
Context toolbar (above canvas)
A floating pill toolbar appears above the canvas and changes based on what's selected:
- Nothing selected — preview backdrop, rulers toggle, and zoom controls (see Preview Backdrop).
- A shape or image selected — fill, gradient, stroke, stroke width, corner radius, shadow, and a "Wrap in Frame" action (see Frames).
- Text selected — font and text formatting controls.
- Multiple objects selected — "Wrap in Frame" (or "Add to Frame" if one of the selected items is already a Frame) and delete.
For per-object actions like layer order (Bring to Front, Send to Back), copy, cut, and paste, right-click the object — these live in the right-click context menu, not the context toolbar.
Timeline (bottom)
The animation engine. Every object that moves, fades, or changes over time is tracked here. Set the frame rate and total duration, add keyframes to objects, and hit Play to preview the animation directly on the canvas.
If you're new to keyframe animation, think of it like this: you set what an object looks like at point A, then what it looks like at point B, and CloudMonet handles the smooth movement between them.