Are you running a live sports broadcast in vMix and want a professional scoreboard on screen? With CloudMonet's ready-made templates, you can set this up in under 5 minutes. Just add a link to vMix as a Web Browser input. Here is the full process.
How does it work?
Here are the steps:
- Choose a template, or build your own scoreboard
- Open the Control Panel for that template
- Customize it — team names, colors, logos, clock
- Copy the links you need for vMix
- Add the output link as a Web Browser input, and overlay it on Program
- Run your show
Choose a template, or build your own scoreboard
Note: If none of the templates match your sport, you can start from a blank canvas and build your own.
Select a template, and go to its control panel.
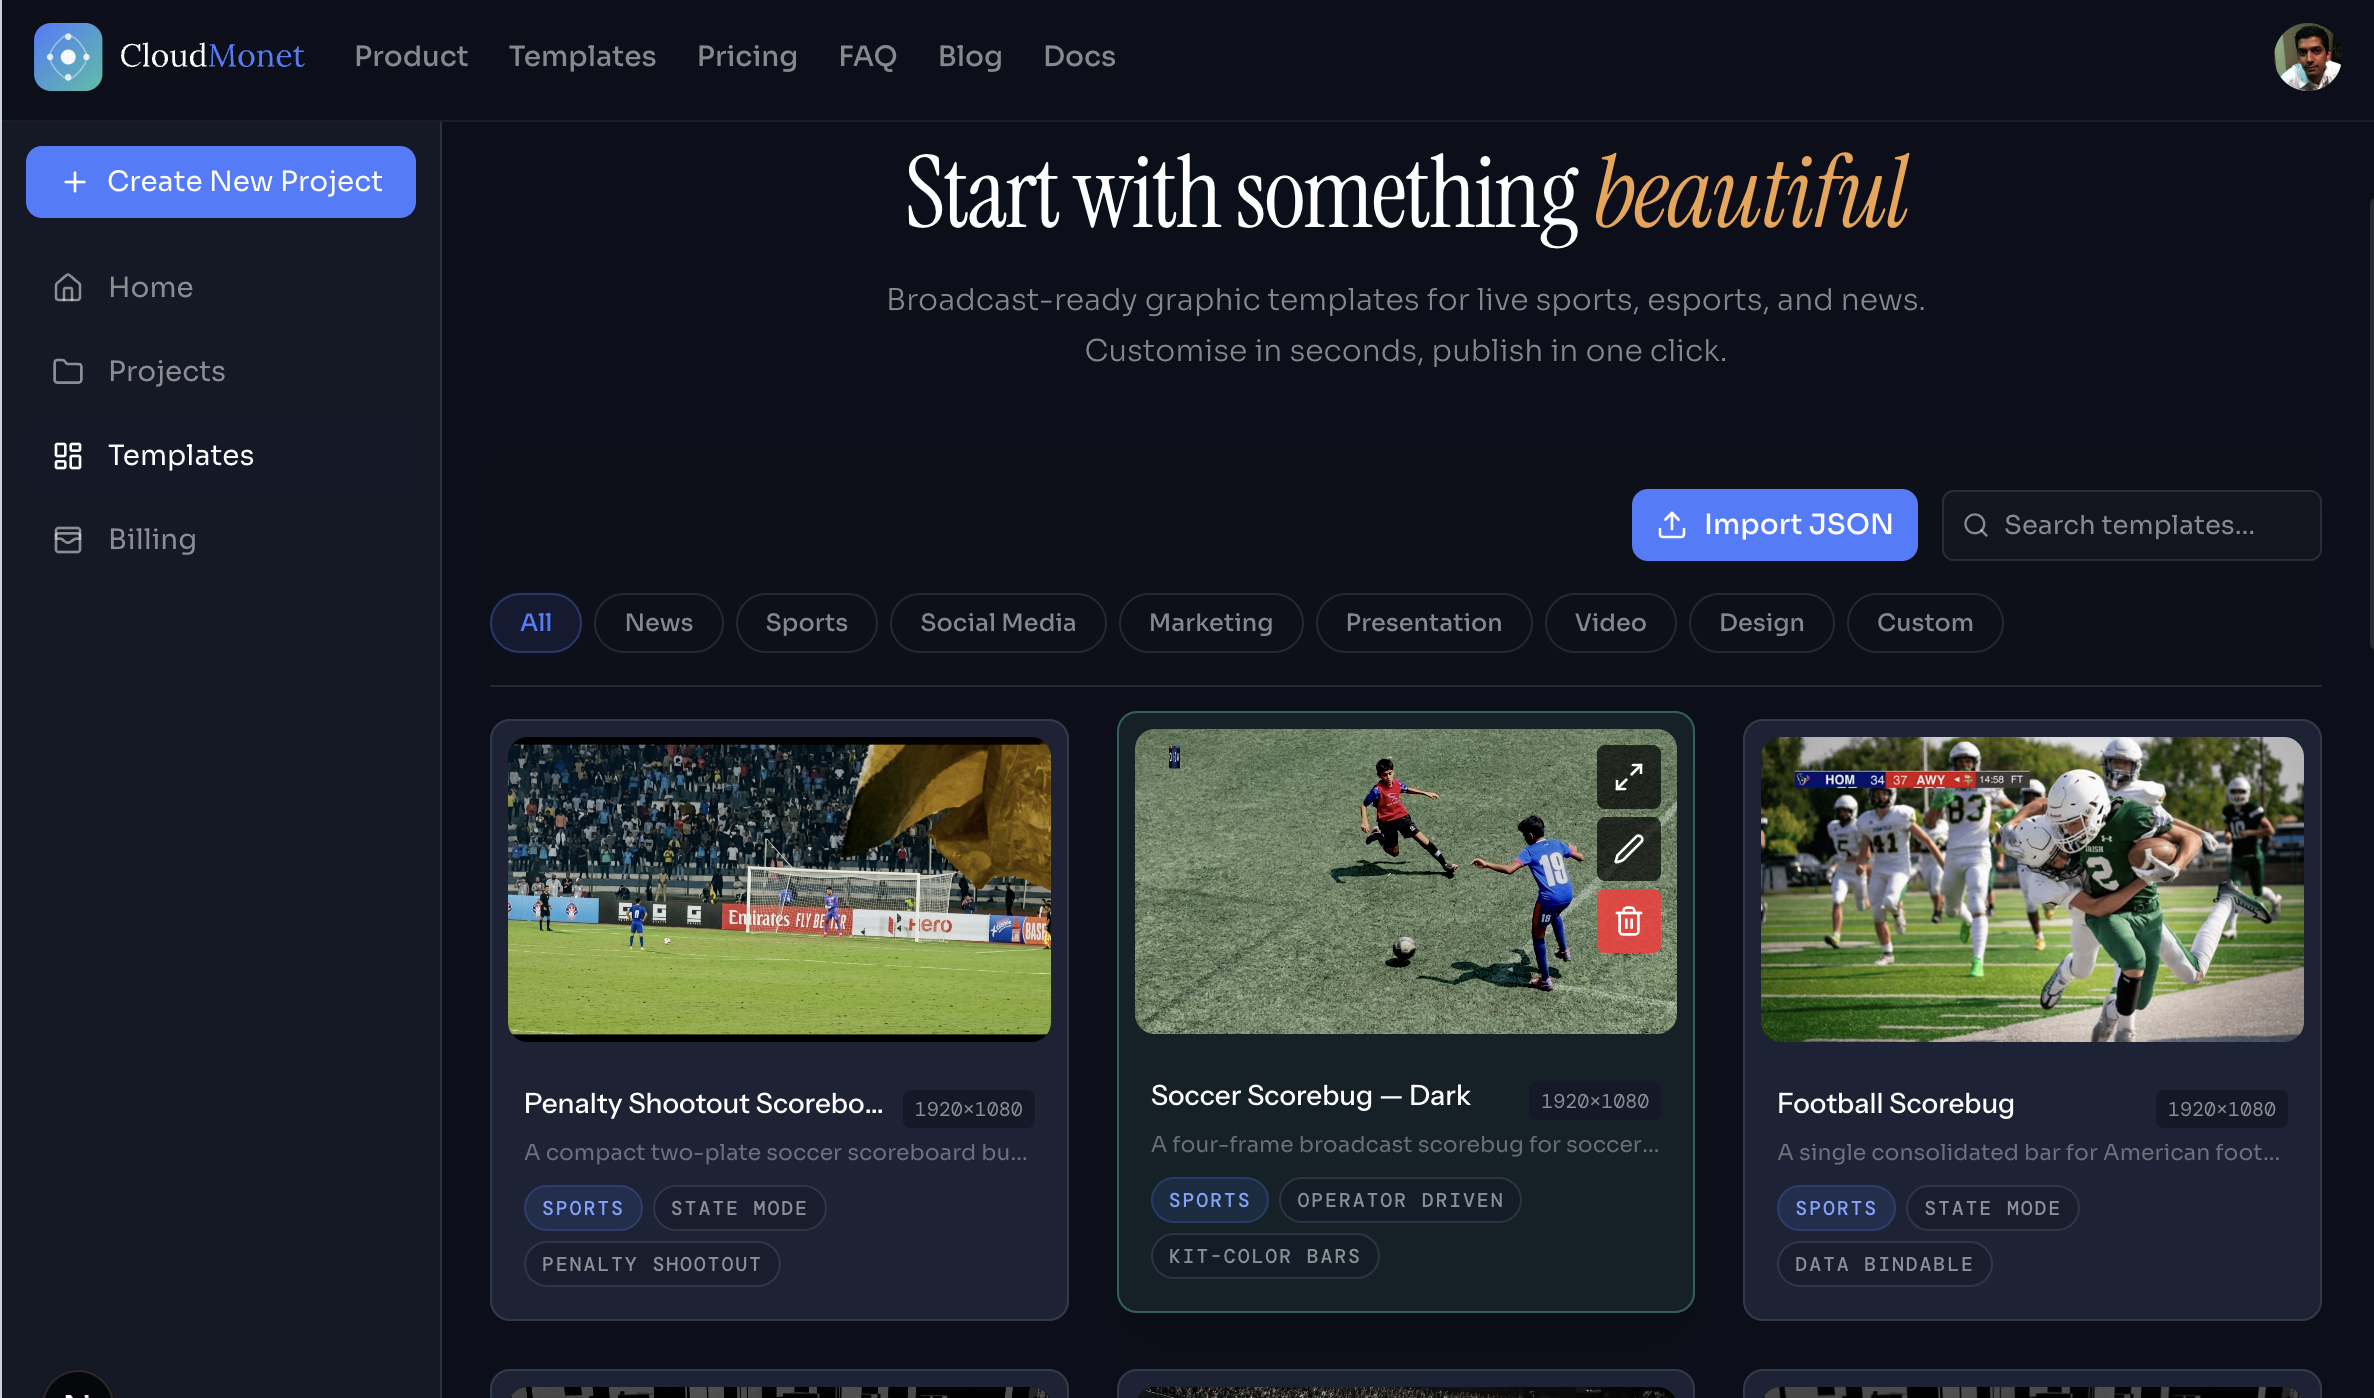
Open the Control Panel
The Control Panel shows a live preview of the graphic next to its controls.
Spend a few minutes in the control app before your broadcast. Try adding a point to the score, running the clock, switching possession, and showing the alert banner. This helps you get comfortable with the controls before the game starts.
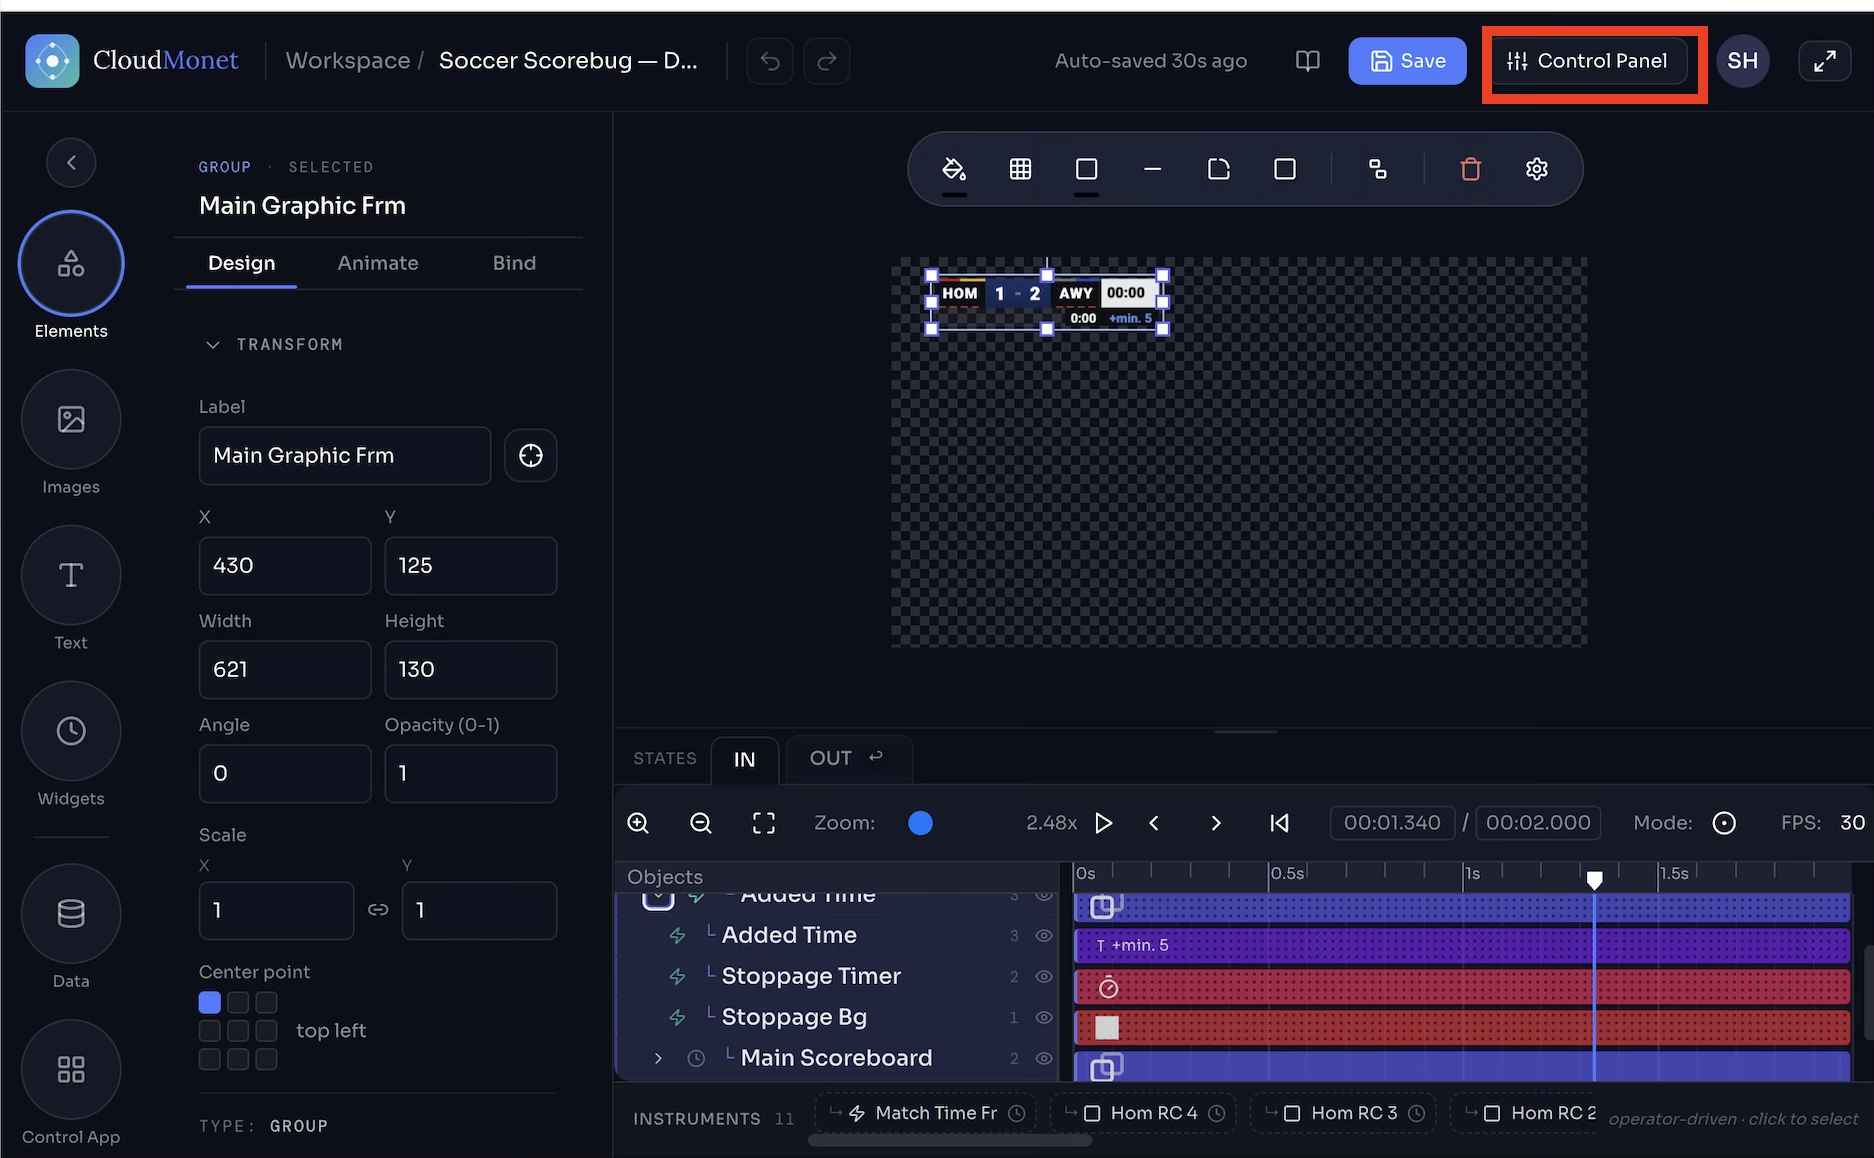
Customize the template (Optionally)
- Team names or abbreviations, and logos
- Team colors (these are usually also used as the background color on the graphic)
- Starting clock time and number of periods
The specific fields to configure depends on the graphic.
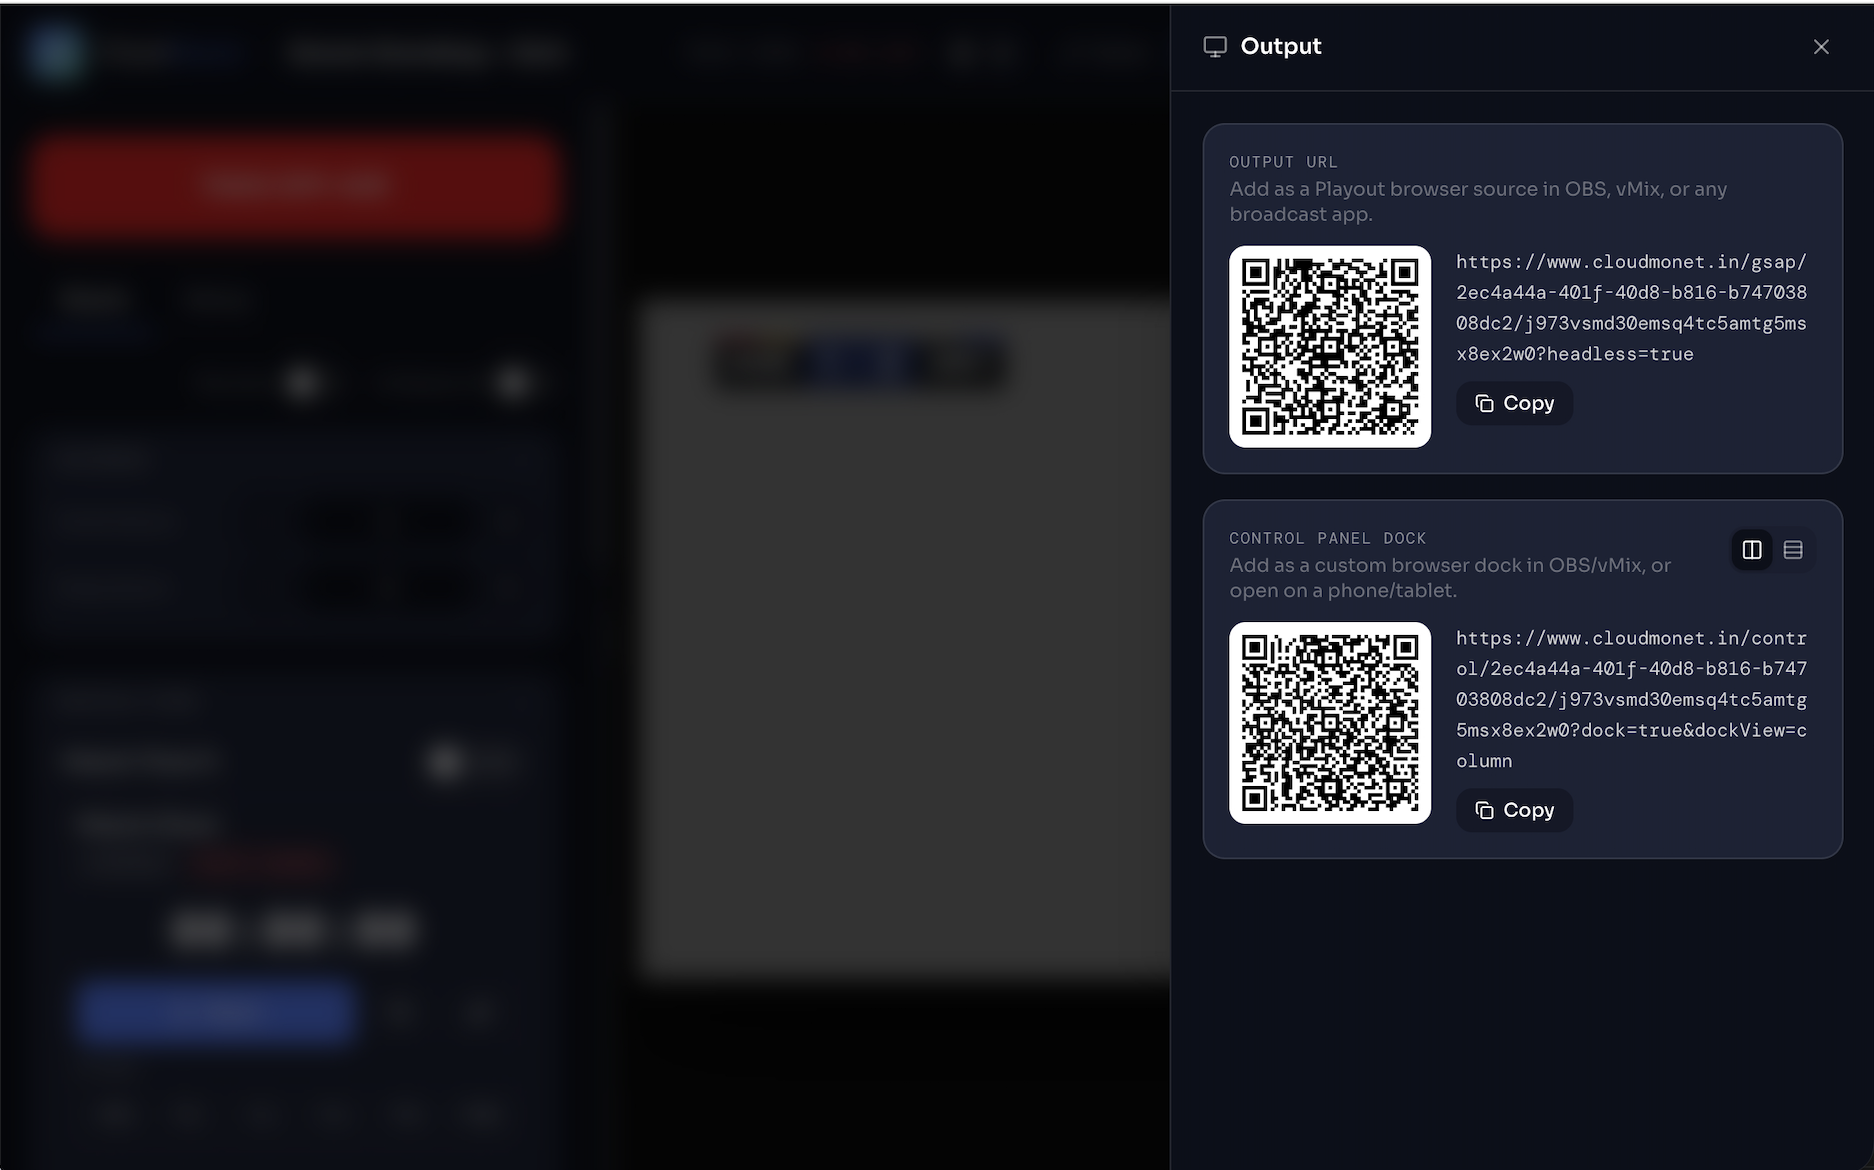
Copy the Output links into vMix
- Output URL — this is the graphic itself, shown on a page with a transparent background. This is the link you add to vMix as a Web Browser input.
- Control Panel Dock URL — this is only the controls from the control app, without the graphic preview. Keep this link open on your own laptop, tablet, or phone. You can also add it as a second Web Browser input on vMix, on a monitor only your scorekeeper sees. Your viewers should never see this page.
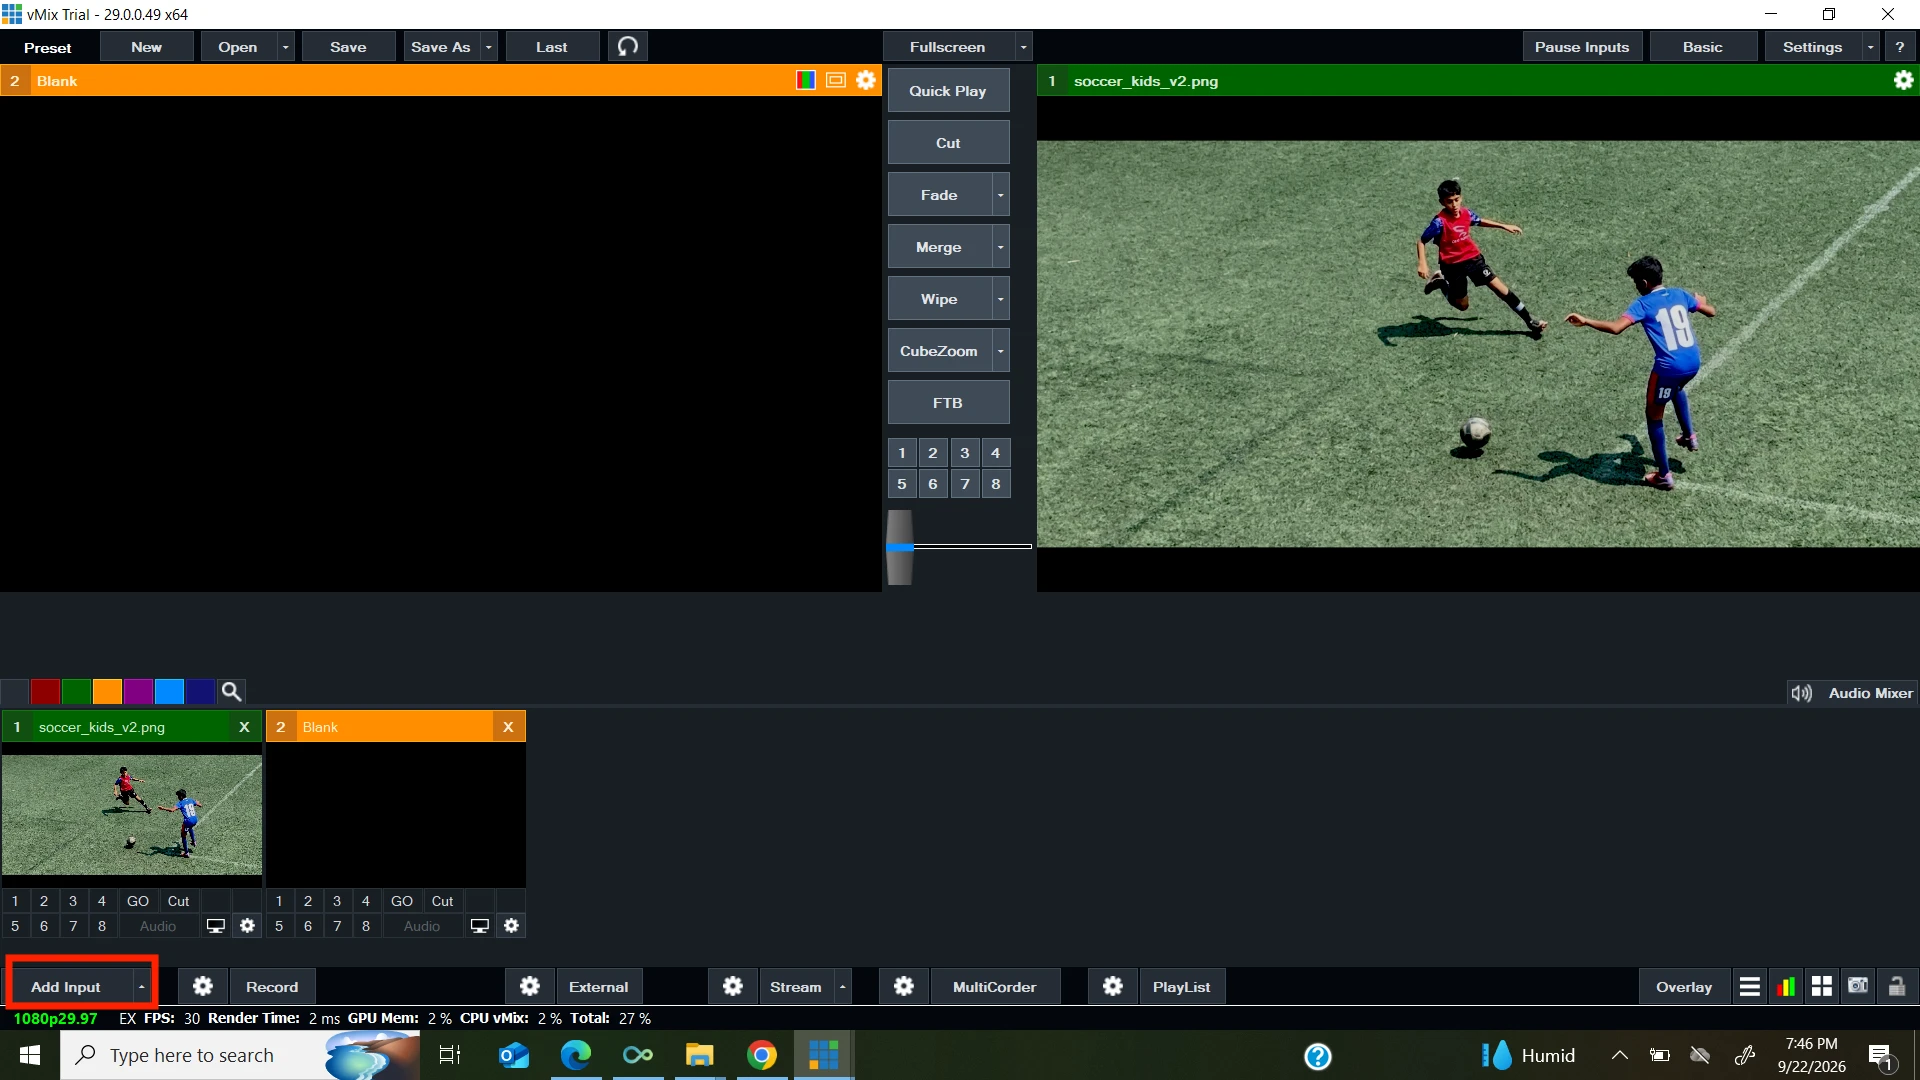
Add the output link to vMix, and overlay it
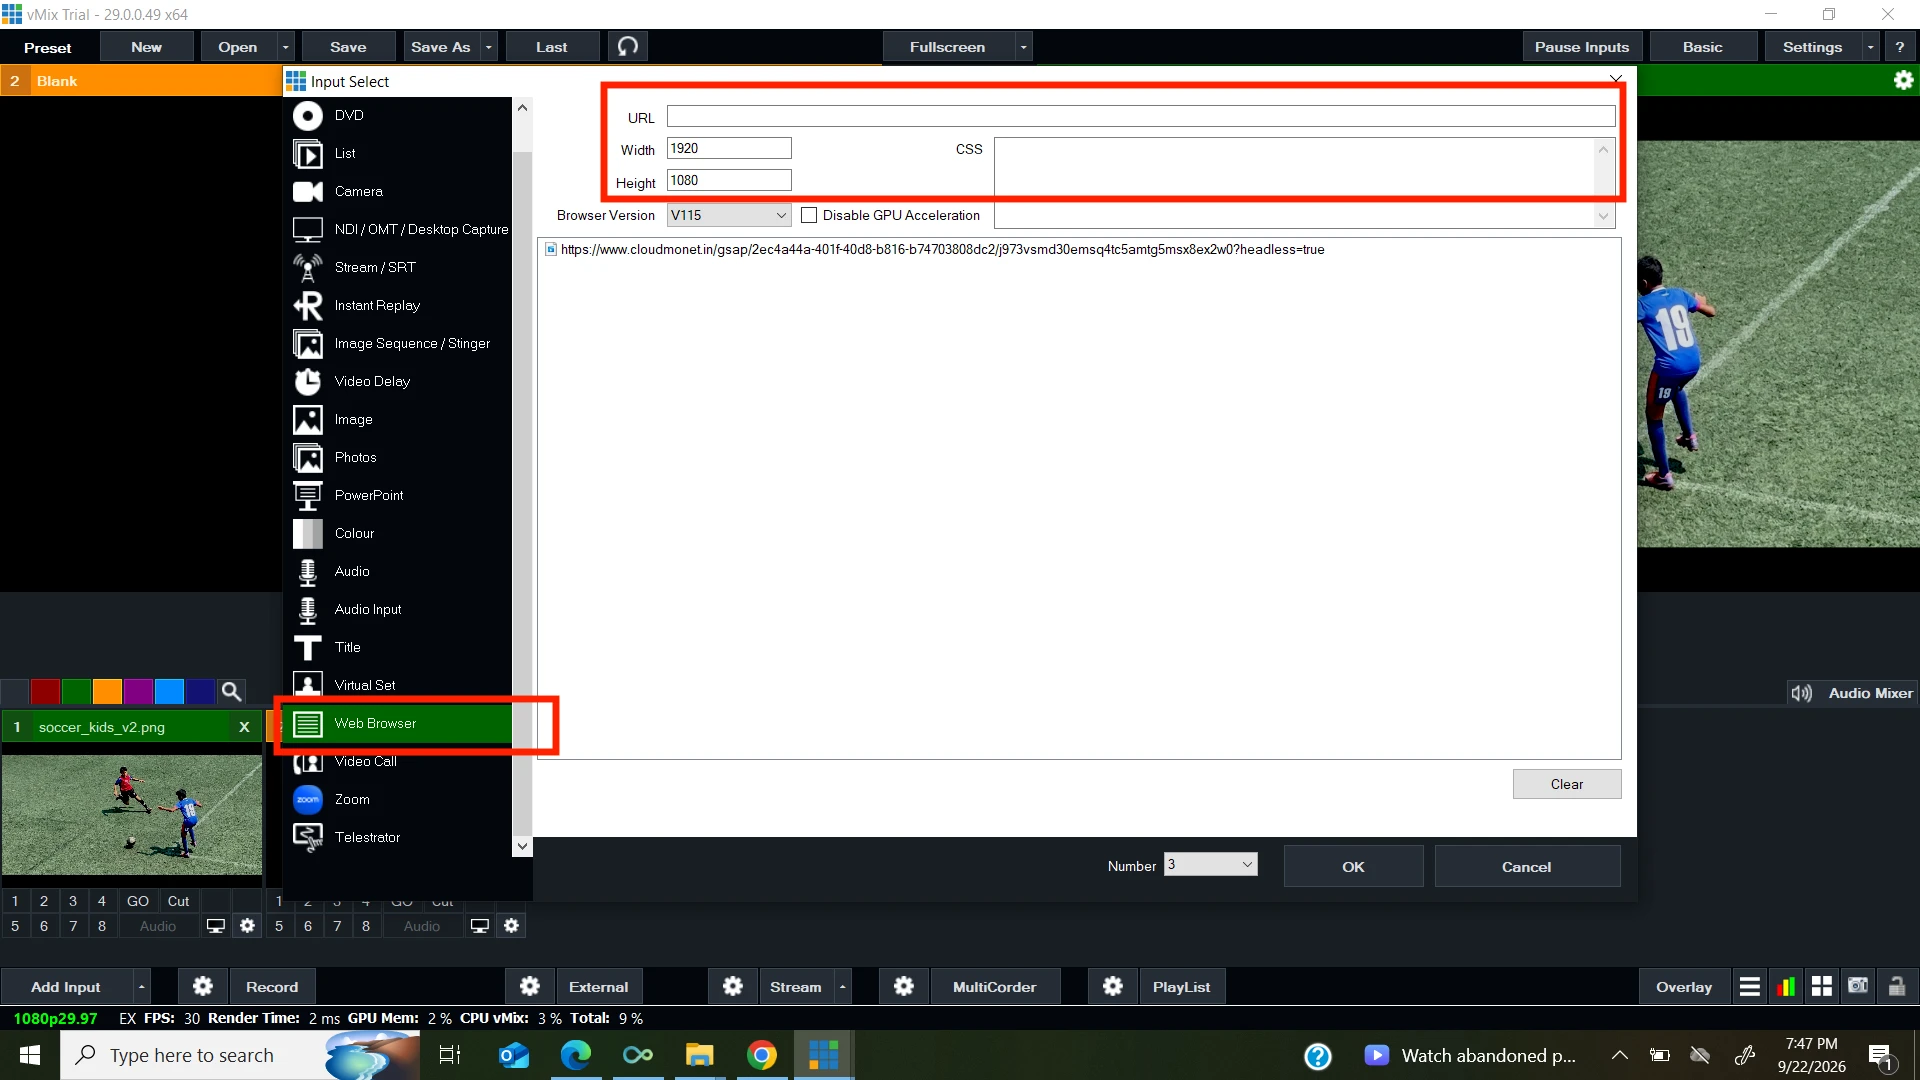
- Click Add Input in the bottom-left of the vMix window, then choose Web Browser from the list
- Paste the Output URL into the URL field, and set Width and Height to match the template's size (usually 1920×1080)
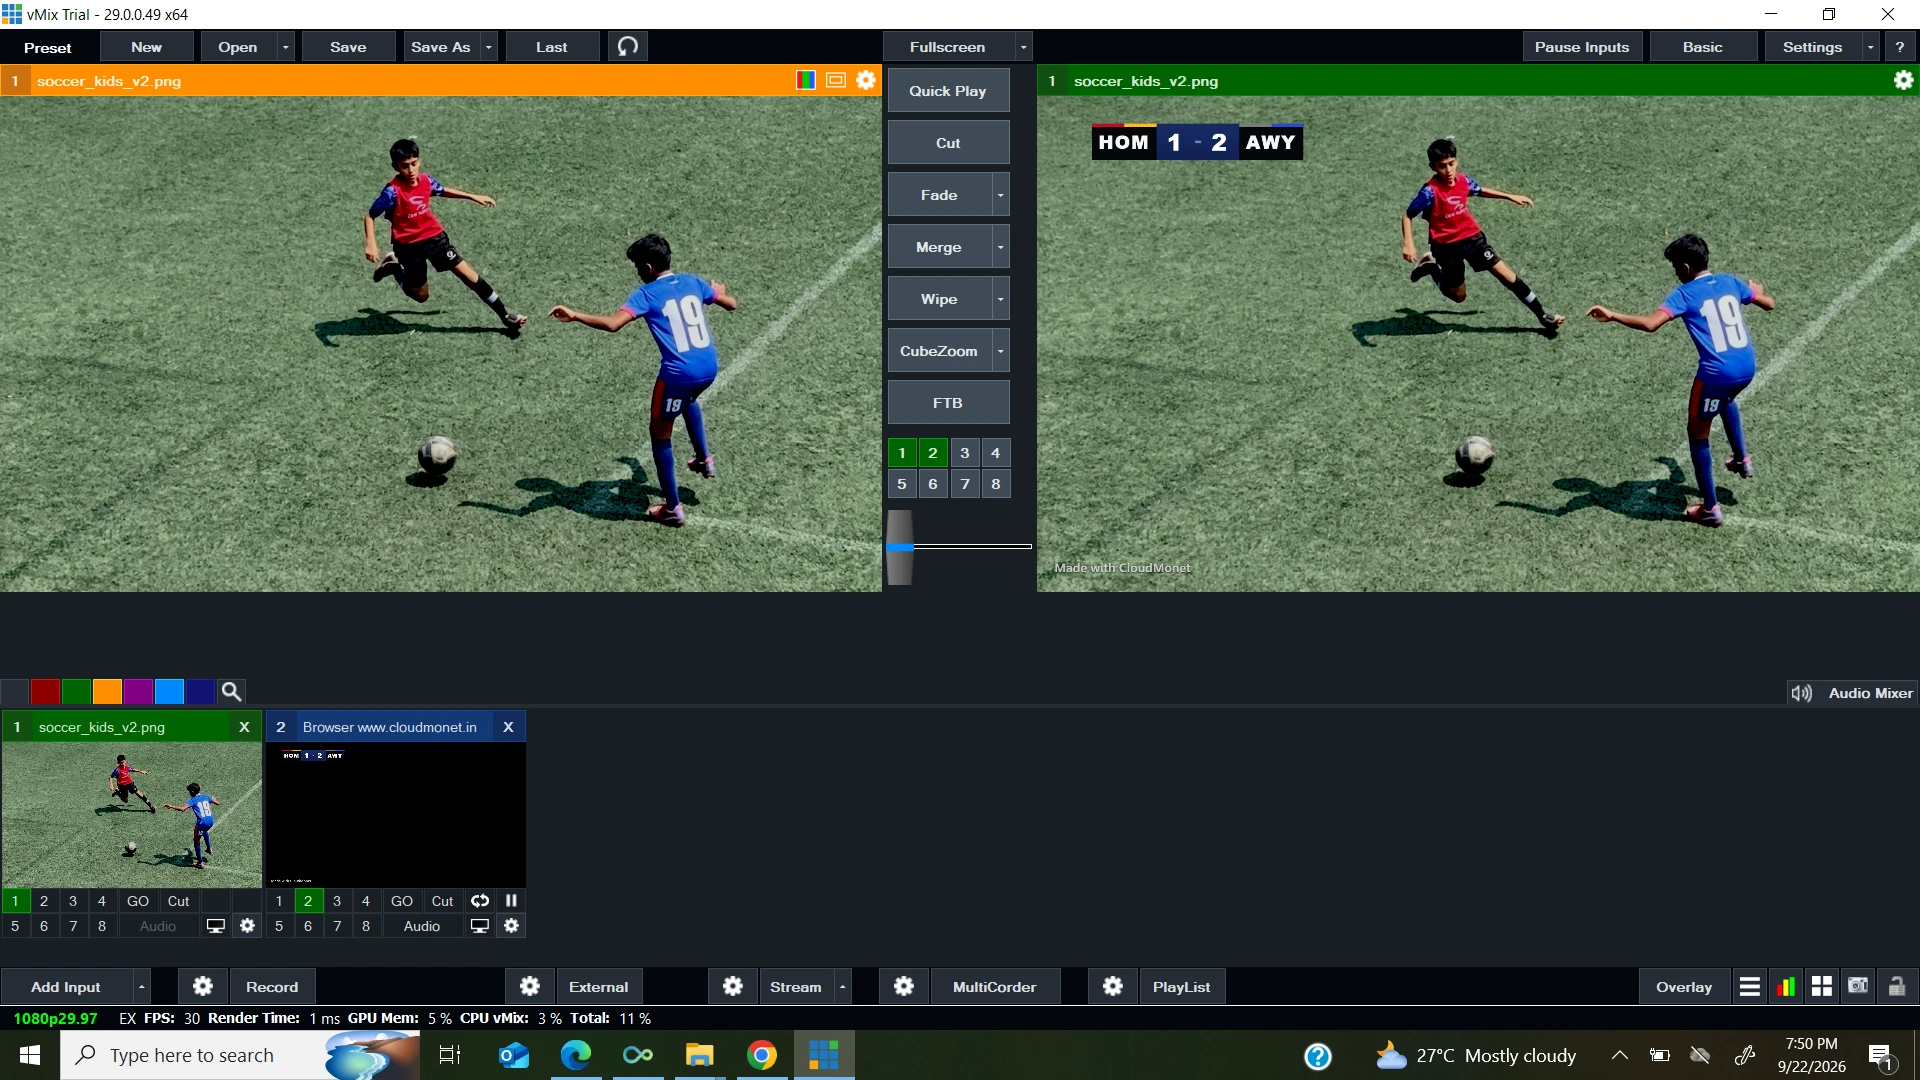
- Click OK — the input now appears in your list of inputs, with the graphic's background already transparent. CloudMonet's output pages are built this way, so there's no extra setting to turn on in vMix
- Instead of cutting to it as a full-screen input, use vMix's Overlay control (bottom-right of the window) to place it on top of whatever input is currently live. This keeps the scoreboard on screen while you switch between cameras underneath it
That covers what your viewers see. For the controls, keep the Control Panel Dock URL open in a normal browser tab on a second device. Your audience never needs to see that page.
Run your show
- Make sure the overlay is actually switched on before you go live — vMix doesn't turn it on automatically. Once it's on, it stays on top of Program no matter which camera or input you cut to underneath it
- If the graphic doesn't appear, or looks stuck, right-click the Web Browser input and choose Refresh Browser
- Check that the input's resolution matches your output resolution, so the scoreboard text doesn't look blurry
The Output URL does not change when you edit the design later. So once it's set up in vMix, you won't need to touch that input again, even for future games.
Why use CloudMonet for this
- · Easy to set up. Templates already have animation and logic built in. You only need to fill in fields, not build layouts or XAML titles.
- · Full editor when you need it. If you want to go beyond the basic controls, you can open the full design editor and change anything in your project.
- · No software to install. All you need is a device with internet access and a browser. You can control the graphic from anywhere, on a different device than the one running vMix.
- · Always up to date. New features and templates are added regularly, at no extra cost. See what's new.
Once your first scoreboard is on air, the same steps — template, control app, output link, vMix Web Browser input — work for every other graphic in CloudMonet's template gallery, including lower thirds, tickers, and lineup reveals.
Frequently Asked Questions
Do I need to install anything to use CloudMonet?
No. CloudMonet works fully in your browser, so there's nothing to install. You only need vMix (or your production software of choice) to display the output.
Does this work with software other than vMix?
Yes. The output link is a normal web page. It works as a Web Browser input in vMix, a Browser Source in OBS or Streamlabs, or in any other tool that supports browser-based sources.
Why is my scoreboard showing a white or black background instead of being transparent in vMix?
This is uncommon, since CloudMonet's output pages have a transparent background by default and vMix's Web Browser input doesn't need any extra setting for it. If it happens, try removing the input and adding it again with the same Output URL.
Should I use a full input or an overlay for the scoreboard?
Use vMix's Overlay control. This lets the scoreboard sit on top of whatever camera or input is live, so it stays on screen while you switch between cameras underneath it.
Can I use CloudMonet for free?
Yes. CloudMonet has a free plan with no credit card required, so you can try the full scoreboard setup before upgrading.
Can more than one person control the scoreboard?
Yes. CloudMonet works in the cloud and supports multiple users, so a second person can open the control app on their own device, separate from the computer running vMix.
What happens if I change the design after publishing?
Nothing changes on your end. The Output URL stays the same. Any changes you make to the design update automatically, without needing to touch vMix again.